Hearth Cooking Event Recipes
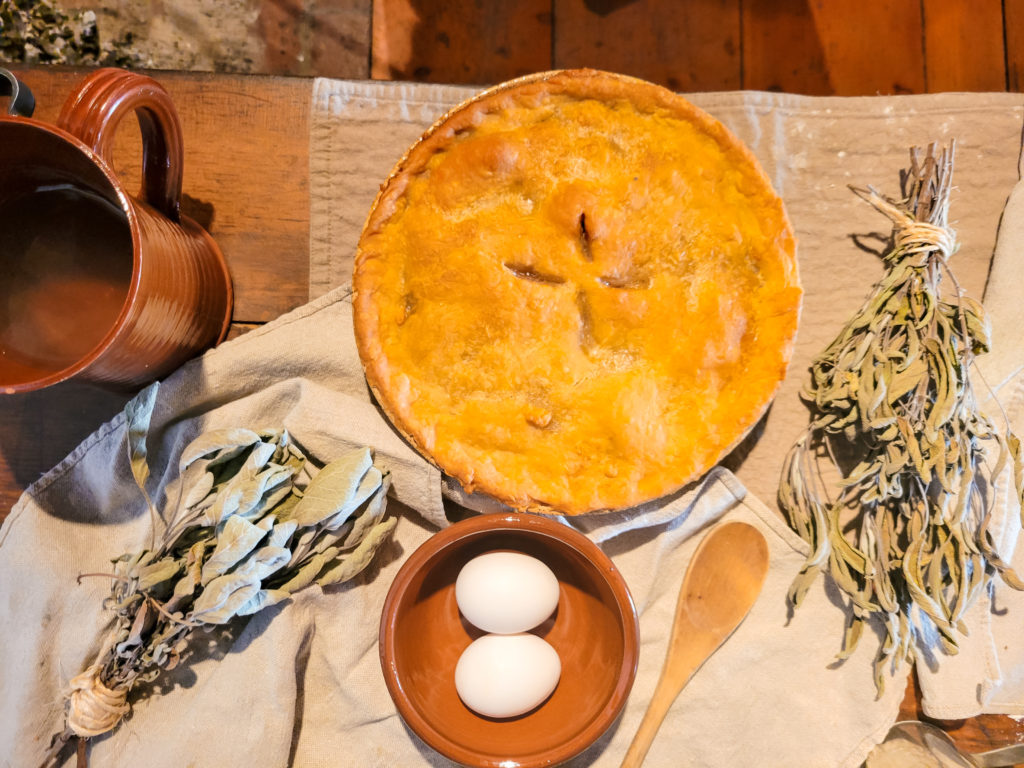
Mince Pies Original Recipe – from The American Frugal Housewife by Lydia Maria Child (1832)
Boil a tender, nice piece of beef — any piece that is clear from sinew and gristle; boil it till it is perfectly tender. When it is cold, chop it very fine, and be very careful to get out every particle of bone and gristle. The suet is sweeter and better to boil half an hour or more in the liquor the beef has been boiled in; but few people do this. Pare, core, and chop the apples fine. If you use raisins, stone them. If you use currants, wash and dry them at the fire. Two pounds of beef, after it is chopped; three quarters of a pound of suet; one pound and a quarter of sugar; three pounds of apples; two pounds of currants, or raisins. Put in a gill of brandy; lemon-brandy is better, if you have any prepared. Make it quite moist with new cider. I should not think a quart would be too much; the more moist the better, if it does not spill out into the oven. A very little pepper. If you use corn meat, or tongue, for pies, it should be well soaked, and boiled very tender. If you use fresh beef, salt is necessary in the seasoning. One ounce of cinnamon, one ounce of cloves. Two nutmegs add to the pleasantness of the flavor; and a bit of sweet butter put upon the top of each pie, makes them rich; but these are not necessary. Baked three quarters of an hour. If your apples are rather sweet, grate in a whole lemon.
Modern Adaptation
1¼ pounds of beef round or leftover roast
¼ pound of frozen shortening (grated)
1½ pounds apples
1 cup raisins or currants
½ cup white sugar
½ cup brown sugar
1/8 teaspoon pepper
½ teaspoon salt
2 teaspoons cinnamon
1 teaspoon clove
2 teaspoons nutmeg
2 cups cider or apple juice
1 tablespoon butter
Shortcrust Pastry (make 2 in separate bowls)
4 cups of all purpose flour , 1.5 cups butter (3 sticks)
Cut the butter into small pieces and then work into flour with fingertips until it resembles breadcrumbs. Add cold water a tablespoon at a time until it is a dough consistency.
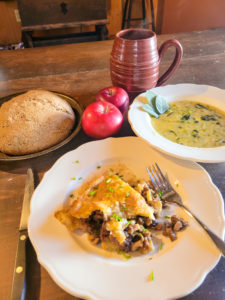
Mince Meat Pie Filling
Add chopped beef and grated shortening to the bowl. Pare, core, and chop apples to make 3 cups. Mix beef, shortening, apples, raisins, white and brown sugars, spices, and cider. Prepare pie crust. Line pie plates with pastry, fill each with half of the meat mixture. Cover with top crusts, seal edges, slit holes on top for steam to escape. If desired, spread a thick layer of butter on pastry for a flaky upper crust. Bake ¾ hour in a hot Dutch oven.
Soop Meagre Original Recipe – from The Art of Cookery: Made Plain and Easy by Hannah Glasse (1769)
Take half a pound of butter, put it into a deep stew-pan, shake it bout, and let is stand till it has done making a noise; then have ready fix middling onions peeled and cut small, throw them in, and shake them about. Take a bunch of celery clean washed and icked, cut it in pieces half as long as your finger, a large handful of spinach clean washed and picked, a good lettuce clean washed, if you have I, and cut small, a little bundle of parsley chopped fine; shake all this well together in the pan for a quarter of an hour, then shake in a little flour, stir all together, and our into the stew-pan two quarts of boiling water; take a handful of dry hard crust, throw in a tea-spoonful of beaten pepper, three blades of mace beaten fine, stir all together and let it boil softly half an hour ; then take it off the fire , and beat up the yolks of two eggs and stir in, and one spoonful of vinegar; pour it into the soop-dish, and send it to table. If you have any green peas, boil half a pint in the soop for change.
Modernized Recipe (Doubled for our purposes):
1 lb butter
12 medium onions (cut small)
2 bunches celery (cut into 1/2″ pieces)
2 large handfuls spinach
2 large handfuls lettuce
1 bundle parsley (chopped fine)
2 tbsp flour
16 c boiling water
2 handfuls dry hard crust
2 tsp pepper
2 tsp ground nutmeg
4 egg yolks
2 tbsp vinegar
2 c peas (optional)
Chop all veggies and combine with spices keeping onions separate. Add butter (1 lb) to a deep stew pan and allow to melt. Add the onions (12 medium) to the pan and allow to soften. When soft add the remaining vegetables and spices. Cook for 15 minutes. Shake in flour (2 tbsp) , stir together and add water (16 cups or 1 gallon). Add torn crusty bread (2 handfuls). Boil for 30 minutes. Take off fire. Stir in egg yolks (4) and vinegar (2 tbsp) and send to the table.
Stewed Pippins Whole Original Recipe – from The Art of Cookery: Made Plain and Easy by Hannah Glasse (1769)
Take twelve golden pippins, pare them, put the parings into a sauce-pan with water enough to cover them, a blade of mace, two or three cloves, a piece of lemon-peel, let them simmer till there is just enough to stew the pippins in, then strain it, and put it into the sauce-pan again, with sugar enough to make it like a syrup; then put them in a preserving -pan, or clean stewpan, or large sauce-pan, and pour the syrup over them. Let there be enough to stew them in; when they are enough, which you will know by the pippins being soft, take them up, lay them in a little dish with the syrup; when cold, serve them up; or hot, if you chuse it.
Modernized Recipe
12 small apples
1 cup White sugar
Pinch of nutmeg
Lemon peel (1 piece)
3 cloves
Water
Peel apples and put in a pot with just enough water to cover them, cloves (3), lemon peel (1 piece), and a pinch of nutmeg. When they have softened remove the apple to another pan and drain most of the water until just about 1 cup is left. Add 1 cup of white sugar and allow to turn to syrup – about 15 min. Pour the syrup over the apples and serve hot or cold.
Three-Grain Bread
“It is more difficult to give rules for making bread than for anything else; …. Some like to have it half Indian meal and half rye meal; others prefer it one third Indian, and two thirds rye…. Put the Indian in your bread-pan, sprinkle a little salt among it, and wet it thoroughly with scalding water. …. When it is cool, pour in your rye; add two gills of lively yeast … About an hour before your oven is ready, stir in flour into your sponge till it is stiff enough to lay on a well floured board or table. Knead it up pretty stiff, and put it into well greased pans, and let it stand … Some people like on third Indian in their flour. Others like one third rye; and some think the nicest of all bread is one third Indian, one third rye, and one third flour …”.
From Lydia Maria Child, The American Frugal Housewife. Dedicated to those who are not ashamed of Economy Twelfth Edition (Boston: Carter, Hendee, and Co. 1833) pp 75 – 78. An adaptation of Child’s approach to bread-baking is included in Caroline Sloat, ed., Old Sturbridge Cookbook, 2nd edition (Guilford, Conn.: The Globe Pequot Press, 1995) p. 204. I used both sources to arrive at the following recipe used at our hearth-cooking evening.
2 cups cornmeal (“Indian meal”)
2 tsp. salt
4 cups boiling water
2 Tblspns dry yeast
1 tsp sugar
½ cup luke-warm water
2 ¼ cups rye flour, divided use
1 cup white flour
3 -4 cups whole wheat flour
Combine cornmeal and salt in a large bowl. Add the hot water and mix well. Let stand until luke-warm. Mix yeast and sugar in half a cup of luke-warm water and wait for it to become foamy. Add the yeast mixture and one cup of rye flour to the cooled cornmeal. Let it stand at room temperature for 2 -3 hours while the yeast is working. Stir in the remaining rye flour, the white flour, and some of the whole wheat flour. When the dough is stiff enough, turn it out onto a floured board and knead it for at least ten minutes, adding more flour as necessary until it feels elastic and ready to rise. Divide the dough into three greased pans, cover with a cloth, and let rise in a warmish place for about two hours. Bake 45 – 66 minutes in a preheated brick oven or at 350⁰ – 375⁰. Placing a small dish of hot water in the oven during baking gives a nice crust.
2023 “Hands-On History” Workshop Series – coming soon
Corn Husk Doll Take Home Sheet
Printed Textiles Take Home Sheet
A Timeline of Printed Textiles:
Around the year 1000: Texts found in India mention printing and decorated textiles
1631: The British East India Company officially begins importing calicos to Europe from India
Late 1600s – mid 1700s: European textile producers in places like England, France, and Amsterdam experiment with producing their own printed textiles to meet a growing consumer demand. Legislation restricts their sale at home, so the American colonies become a major market for these fashionable and colorful fabrics which only the very wealthy could afford.
- These developments required a lot of research into the properties of different dyes and mordants for producing color on cotton vegetable fibers!
1770s: By the American Revolution, industrial and technological innovations mechanized the production of cotton textiles, making them more affordable. They became more of a “working and middle class” consumer good, leading to our association of calico as the clothes of 19th century pioneers.
1810: The growing of cotton in the American South also influenced the establishment of mills in New England towns, like Rehoboth. In 1810, a group of Rehoboth residents set up the Palmer River Manufacturing Company (later called the Orleans Mill), to turn raw cotton into cloth. The cloth produced in this mill was then sent to other nearby factories for printing.
1810: The Wilkinson Factory next to Slater Mill was established in present-day Pawtucket, Rhode Island. We know that machine calico printing took place in this mill!
Historical Terms:
Calico – This word has had slightly different meanings in different parts of the world. In the UK it referred to the weave of cotton cloth – an off-white, unbleached cloth with a plain weave, more durable than muslin. The word “calico” was derived from the English word for the region in India where this type of weave was produced.
Because these fabrics were often decorated with repeating patterns (often floral), 19th century Americans used the word to mean any durable cotton fabric decorated with colorful repeating patterns.
Chintz – A repeating pattern decoration printed on textiles or pottery. In India, these were often floral or animal.
Mordant – A chemical that combines with a dye to help it hold fast to the cloth fibers even after washing. Certain mordants can also impact the shade of color produced. 17th and 18th century mordants included alum, tin, iron and copper.
Relief Printing – A method of printing in which a surface is carved so that the raised (or non-recessed) surfaces are inked and brought into contact with the paper or fabric.
Further Reading & Resources (Books available through the SAILS Library Website):
Youtube stamp-making demonstration using relief-print carving and stamping methods: https://www.youtube.com/watch?v=3Z4SM5E_hY0
18th century calico designs at the Victoria & Albert Museum: https://www.vam.ac.uk/articles/rococo-textile-designs-by-william-kilburn#slideshow=208544&slide=18
Zara Anishanslin, Portrait of a Woman in Silk: Hidden Histories of the British Atlantic World
Gwen Diehn, Simple Printmaking Techniques: a beginner’s guide to making relief prints with linoleum blocks, wood blocks, rubber stamps, found objects, & more
Lilias MacBean Hart, The Four Seasons of Mary Azarian
***
How to Design and Print on Fabric or Paper
You will need the following materials to create your own design and print it on fabric or paper at home:
Materials (can be purchased at most craft stores)
- Speedball or SafetyCut carving block*
- Lino-cutter carving tool*
- Water soluble block printing ink or an ink pad.
- Small rubber brayer (paint roller)
- Leaves, flowers, or other items from nature that you want to experiment with!
- The paper or fabric you want to print (For fabric: a cotton-based material – cotton, muslin, etc. – holds ink best.)
*For wood block carving, you will need a block of pine or basswood and wood gouges instead of the lino-cut tool.
Instructions
Step 1: Using pencil, draw your design on a piece of white scrap paper. Start simple! Remember, whatever you draw must fit the size of the block you will carve.
Step 2: Transfer your design to the block.
For the rubber blocks, this can be done in two ways. Either place your design face up on top of the rubber block and trace over it again with pencil (you may need to be heavy-handed with the pencil)
OR flip your design face down on the block, and, using the same pencil, make a pencil rubbing on the back of the scrap paper. With this second method, whatever you draw will be reversed once you transfer it onto the block. This is especially important if there are any words or letters in your design.
Step 3: Screw a narrow carving tip into your lino-cutter, and carefully carve out your design. Apply only light pressure and move the block continually so that your fingers remain behind the carving tool.
You may switch to a larger carving tip if you need to carve out large areas, but the narrower carving tip should serve for most purposes.
There are two ways to approach the carving process. The simpler approach is to carve right over the outline of the pencil lines you drew. When you ink and stamp your block, your design will appear as white lines against a colored background.
The second approach – relief carving – is more similar to historical methods of textile printing. Using this method, you carve alongside the pencil lines you drew, leaving the lines untouched. Once you gently carve away the block on either side of your pencil lines, your original pencil lines will be raised, and will be printed once your block is inked and stamped. In the words of Cheryl, “it’s not what you take away, it’s what you leave, that matters.”
Step 4: Once your block is carved, it’s time to practice inking and printing.
Printmaking is a process of trial and error, and you may not be satisfied the first time you stamp. That’s OK! The first couple of stamps will allow you to see places that you want to carve a little more, how much ink or paint you need, how much pressure to apply to the stamp, etc…
Step 5: Once you are satisfied with your block carving, carefully ink the rubber brayer so that the paint or stamp ink is evenly distributed.
Step 6: Roll the brayer across your carving to apply the ink.
Step 7: Carefully place your block face down on paper or fabric. Place a piece of scrap paper over your block and roll a clean brayer back and forth over the block to apply even pressure.
Step 8: Remove scrap paper and block from fabric carefully.
Step 9: Allow to dry completely.
NOTE: Before washing, “heat set” your design into the fabric by placing a clean towel over your completely dry print and ironing.
Step 10: Wash your stamp and brayer with soap and water. You can use these again and again!
Fiber Arts Take Home Sheet
At Home Student Activities
Students can learn about local history and geography at home with these simple and fun activities. All you need is a printer, a writing utensil, and some colored pencils or crayons.
Each activity is labelled for its appropriate age group.
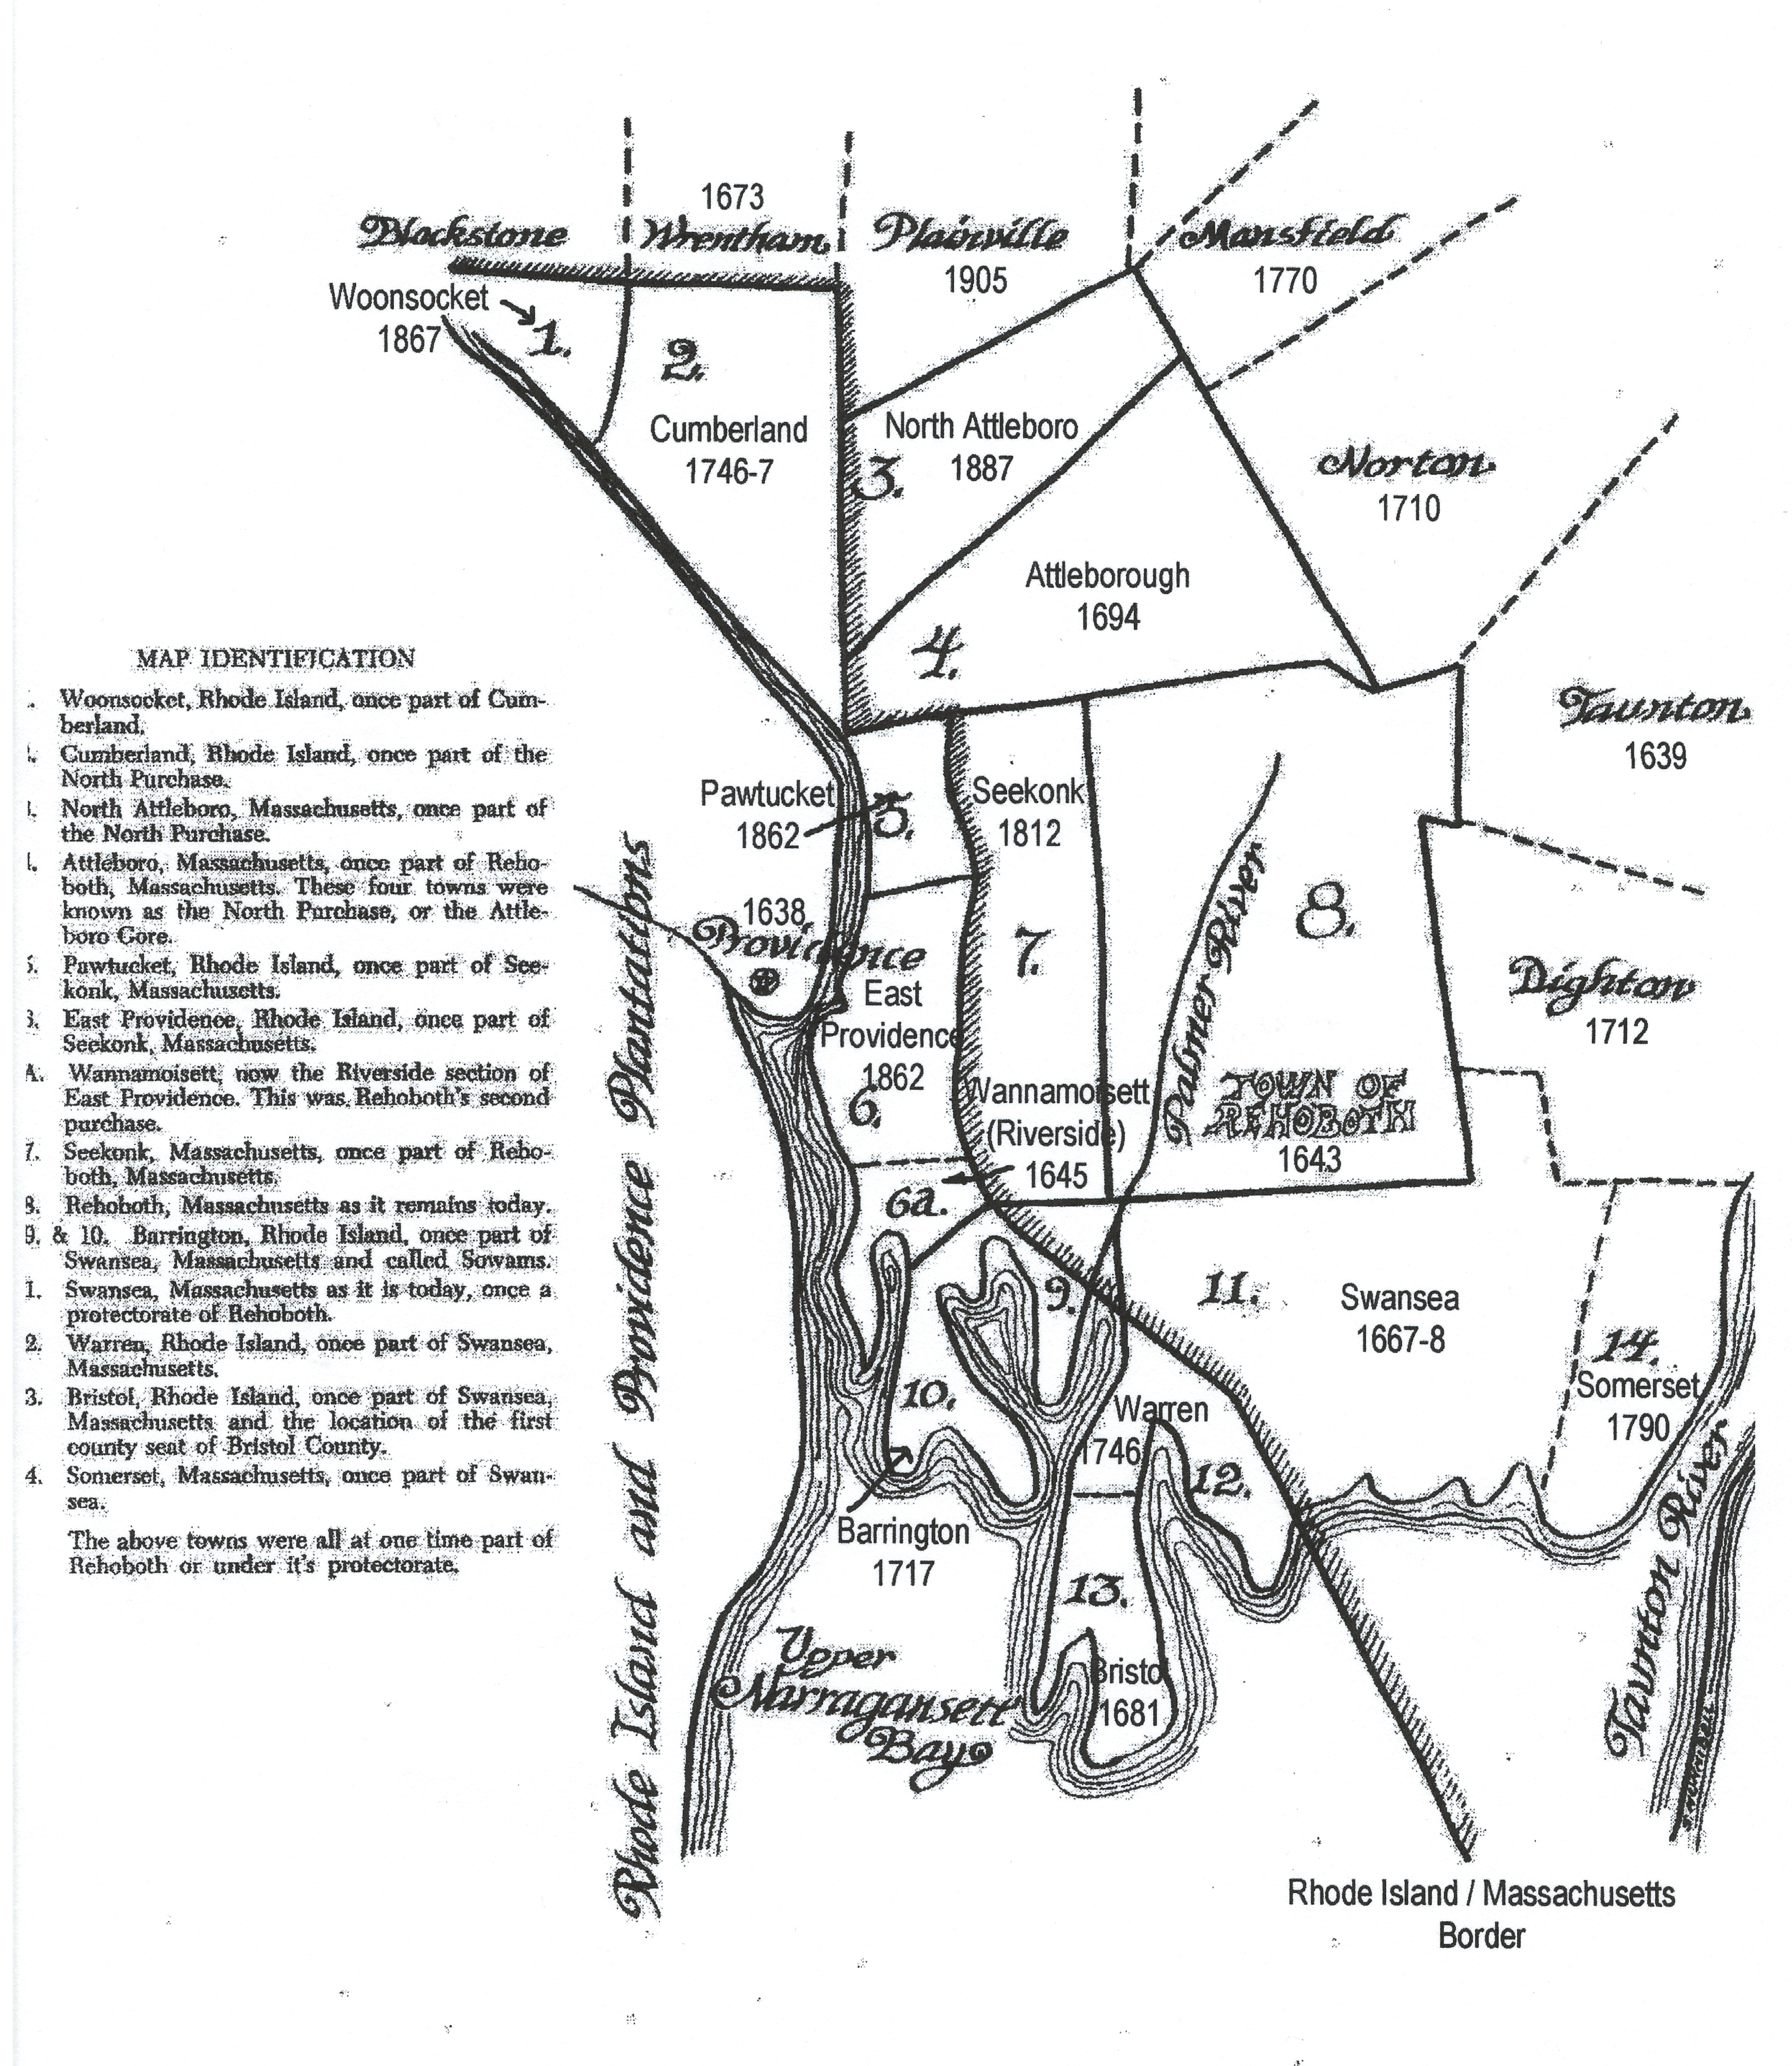
Rehoboth Old Town Borders (3rd/4th grade)
Did you know that Rehoboth was once larger than it is today?
When it was first settled in 1643, it included the same area as 14 towns that exist today.
Rehoboth claimed land as far north as a portion of Woonsocket to as far south as Bristol and from the Seekonk River in East Providence to Somerset, MA.
Let’s look at a map of old Rehoboth and identify the towns which were created after its settlement.
Number your page 1-14 and list the towns (14) that were all at one time a part of Rehoboth or under its protection.
Print this map to complete the activity

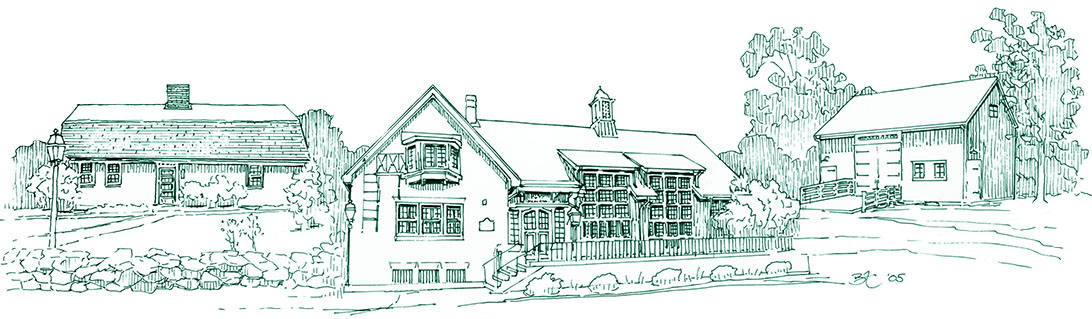
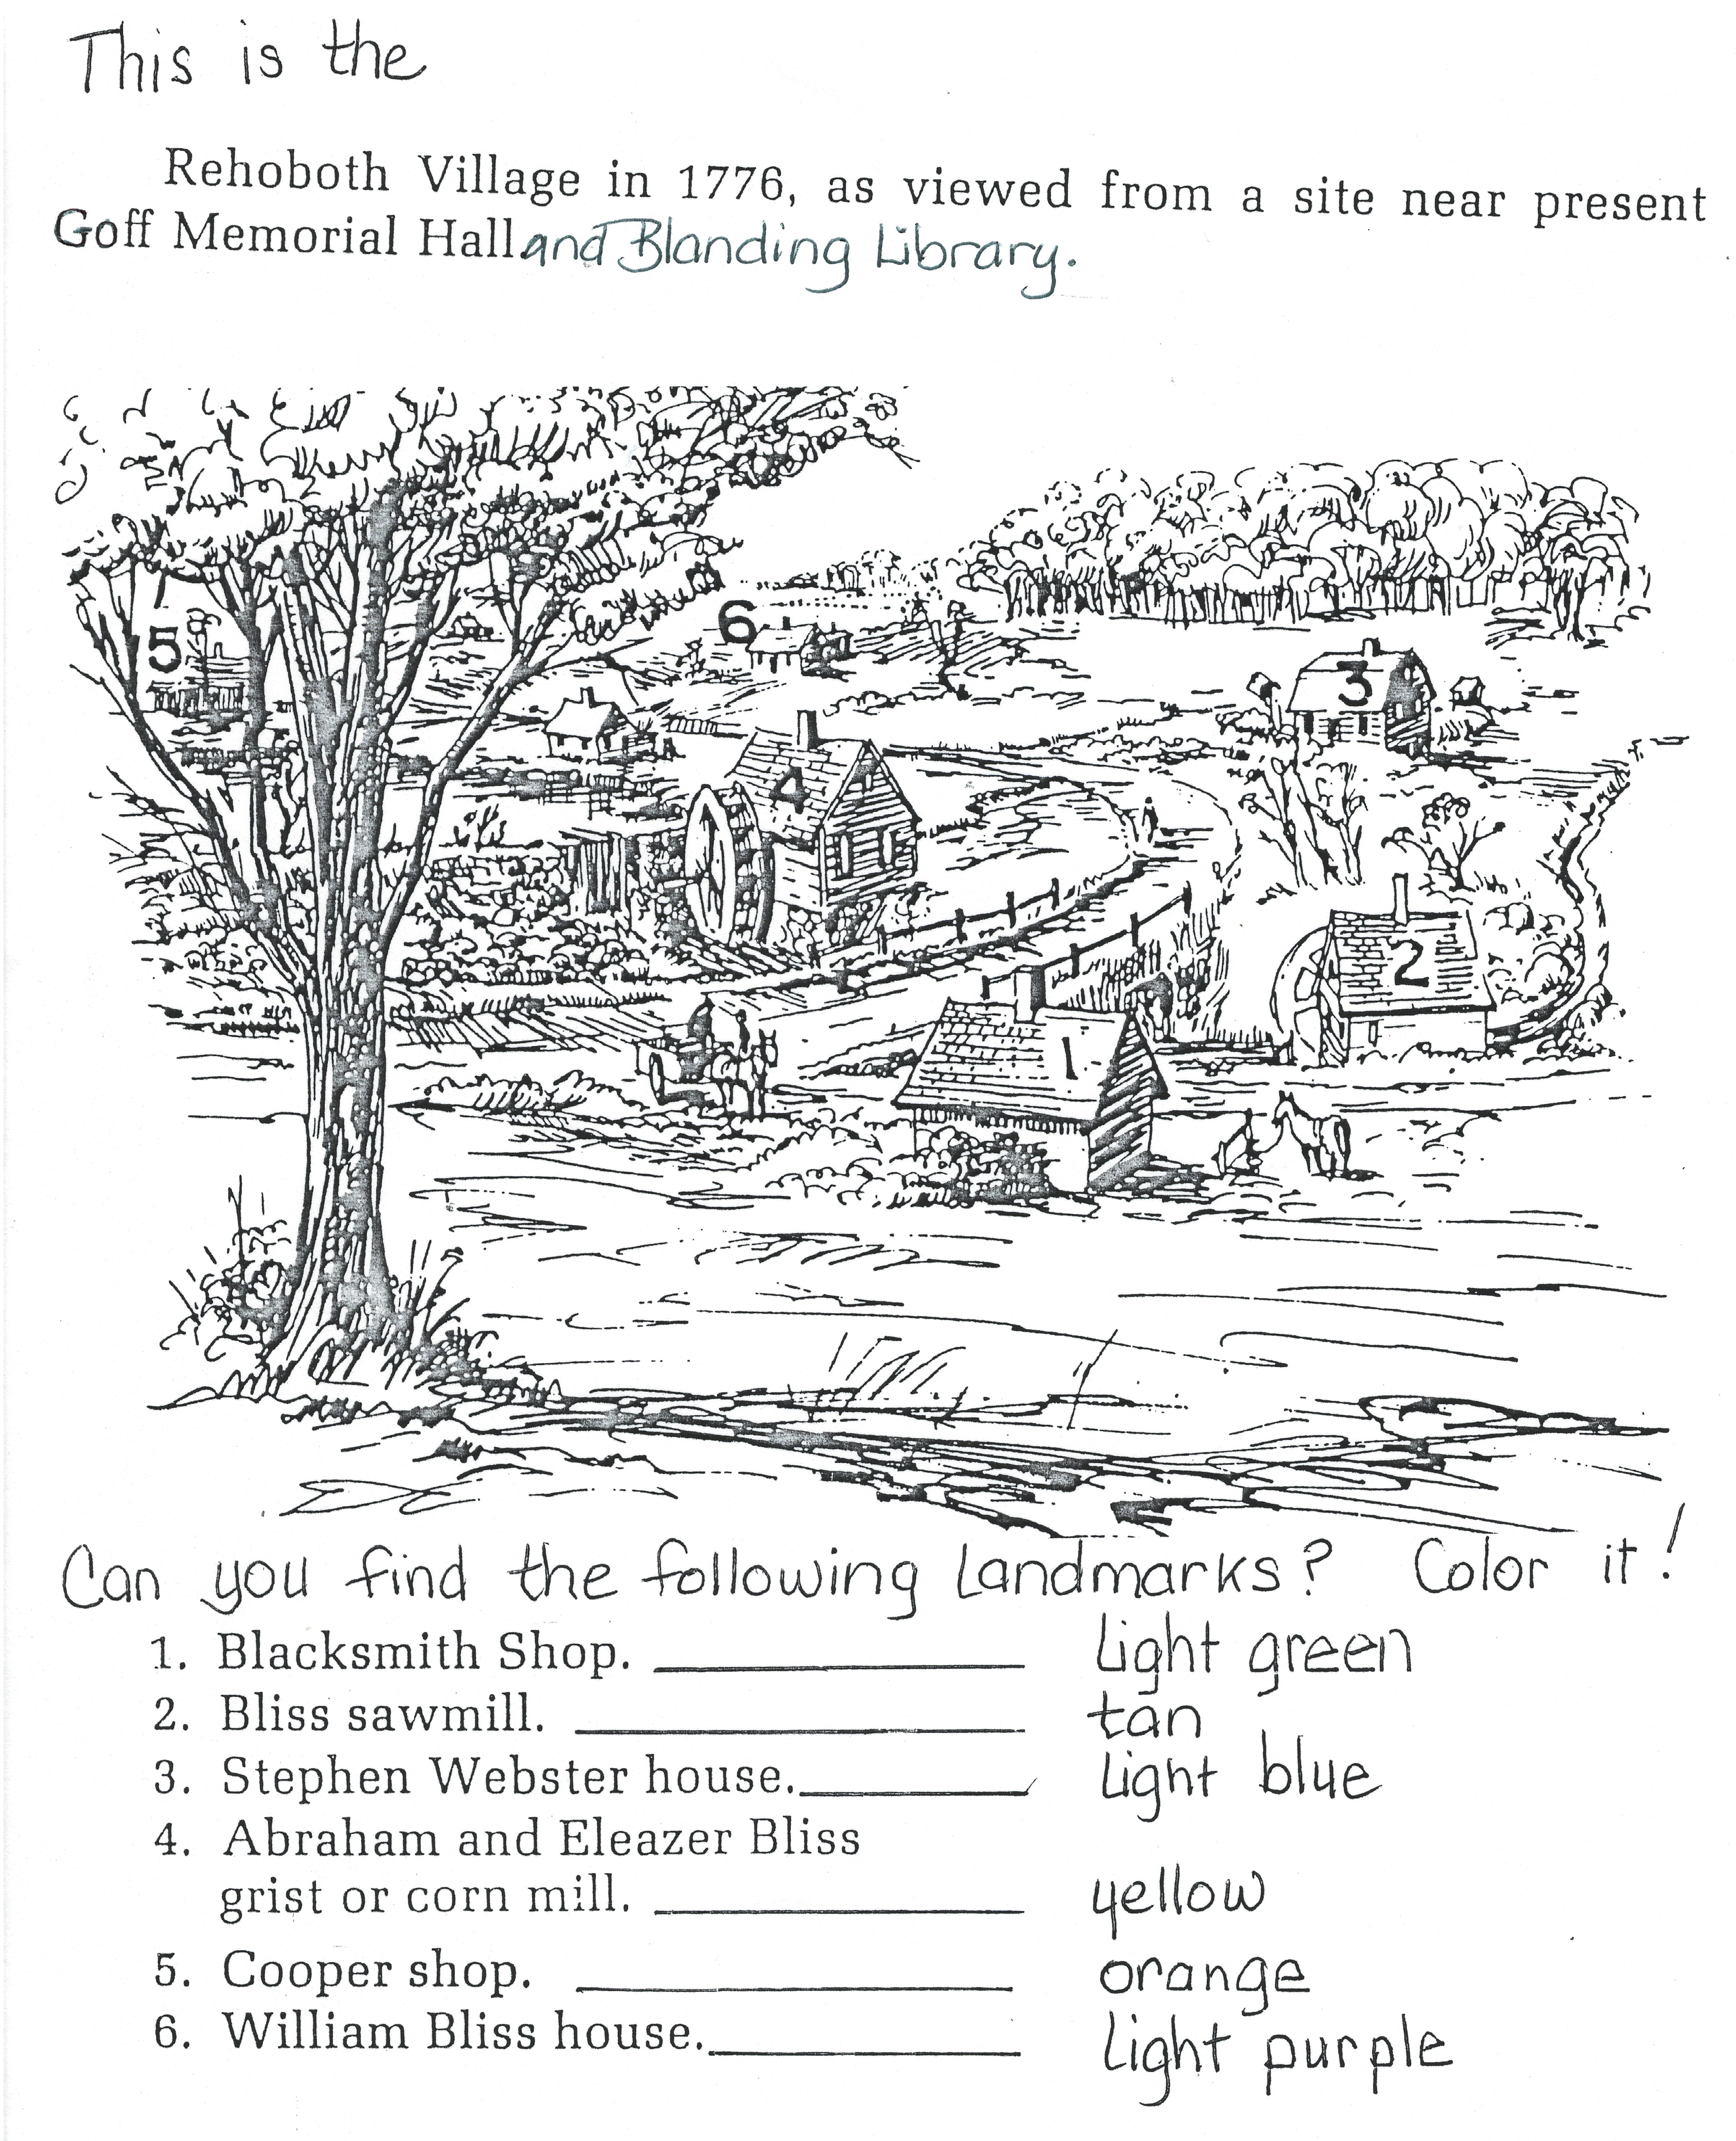
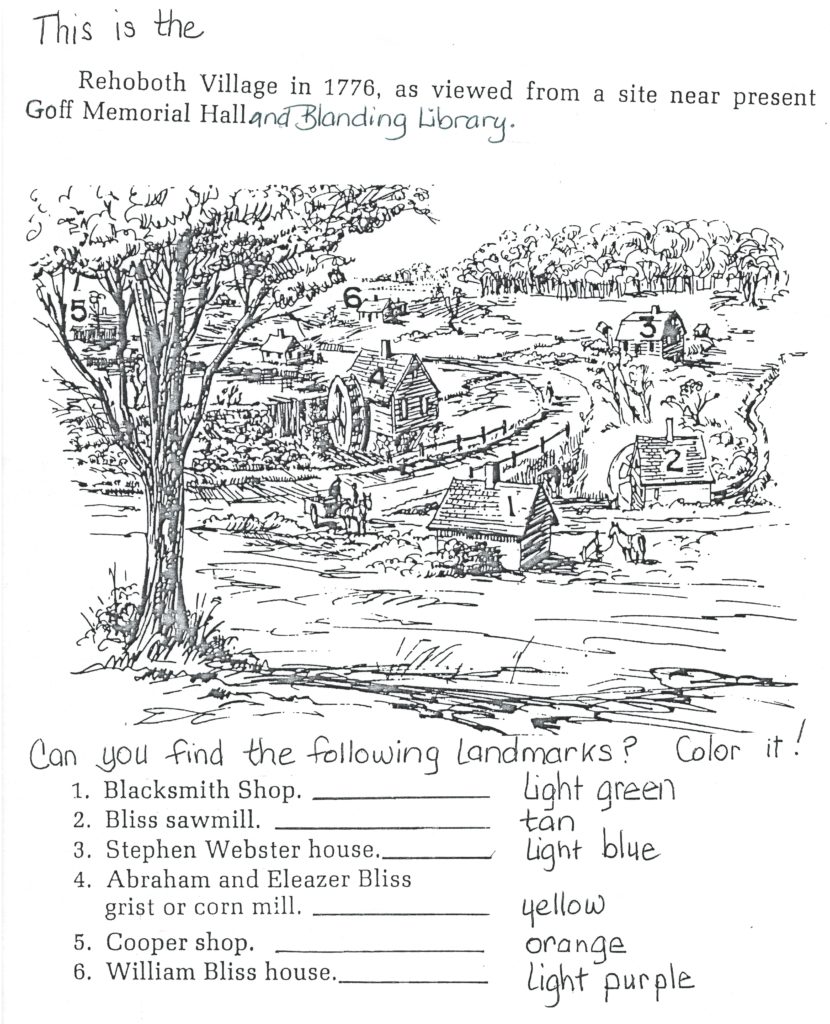
Rehoboth Village Pond (2nd-4th grade)
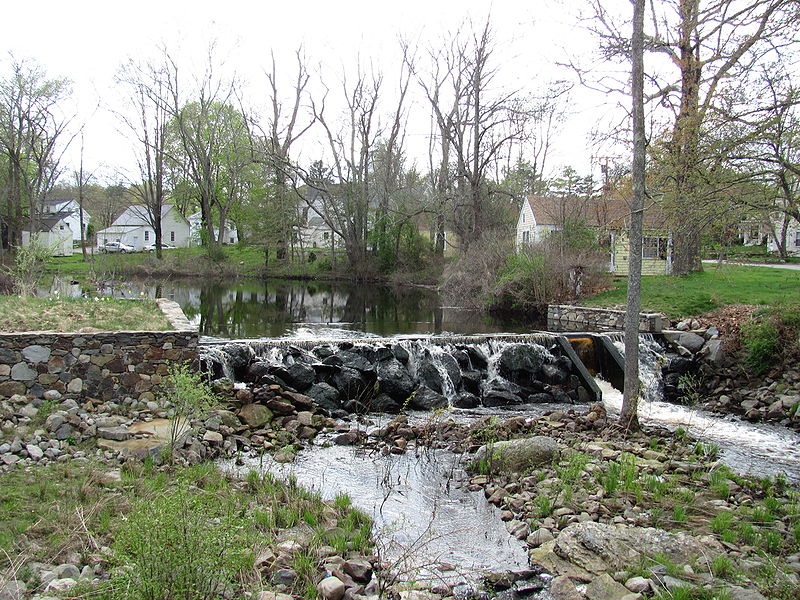
The Rehoboth Village looked a little different in 1776 than it does today. Print this drawing of the Village and follow the directions to color local landmarks that existed more than 240 years ago.
1776 Rehoboth Village Worksheet
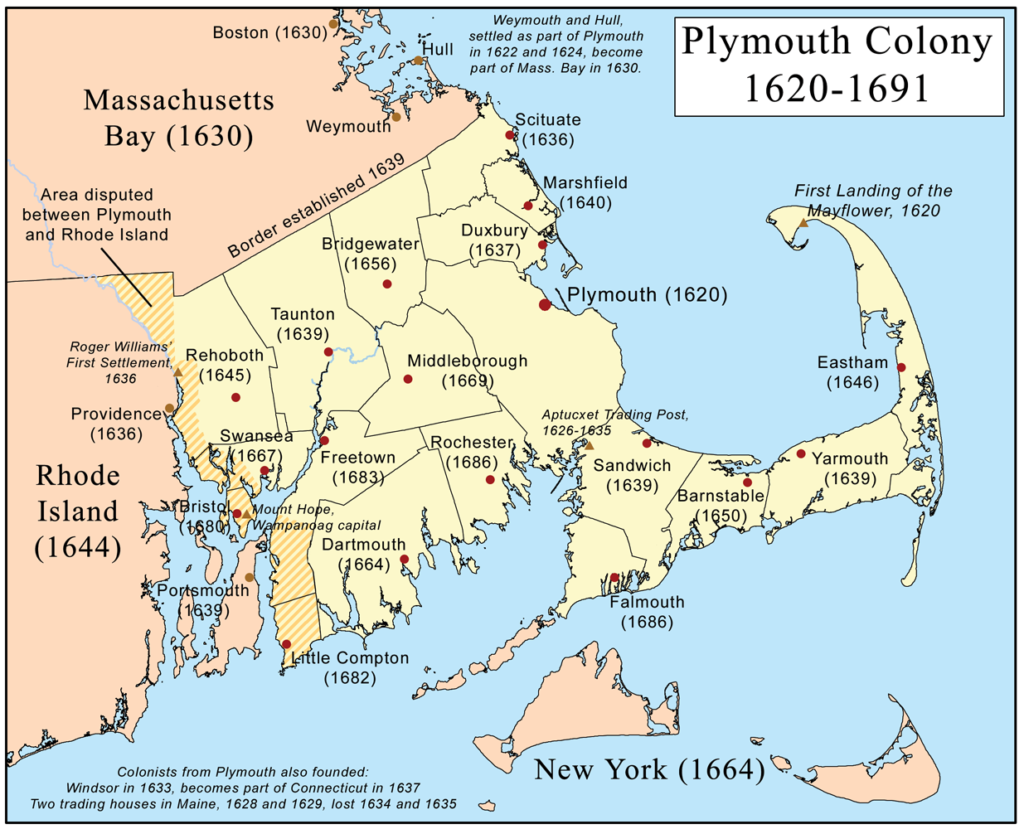
Plymouth Colony Settlement (4th/5th grade)
Rehoboth is part of Plymouth colony. While Plymouth celebrates its 400th anniversary this year parts of the colony were settled at different times. Use the below map and worksheet to discover settlement years.
Print the Activity Worksheet Here
Print the Plymouth Colony Map Here